
Hello Everyone.
Today I want to share an ATC card that I made for the Creative Souls retreat.
*unfortunately I wasn't able to attend since we ended up moving that weekend.
*unfortunately I wasn't able to attend since we ended up moving that weekend.

I had a small bird charm that I thought was so cute, I wanted to add it to my ATC's but I only had one. So I mixed equal parts A and B of Amazing Mold Putty. Mix thoroughly. Press the charm into putty - allow to set for 5-10 minutes then I un-molded the charm.
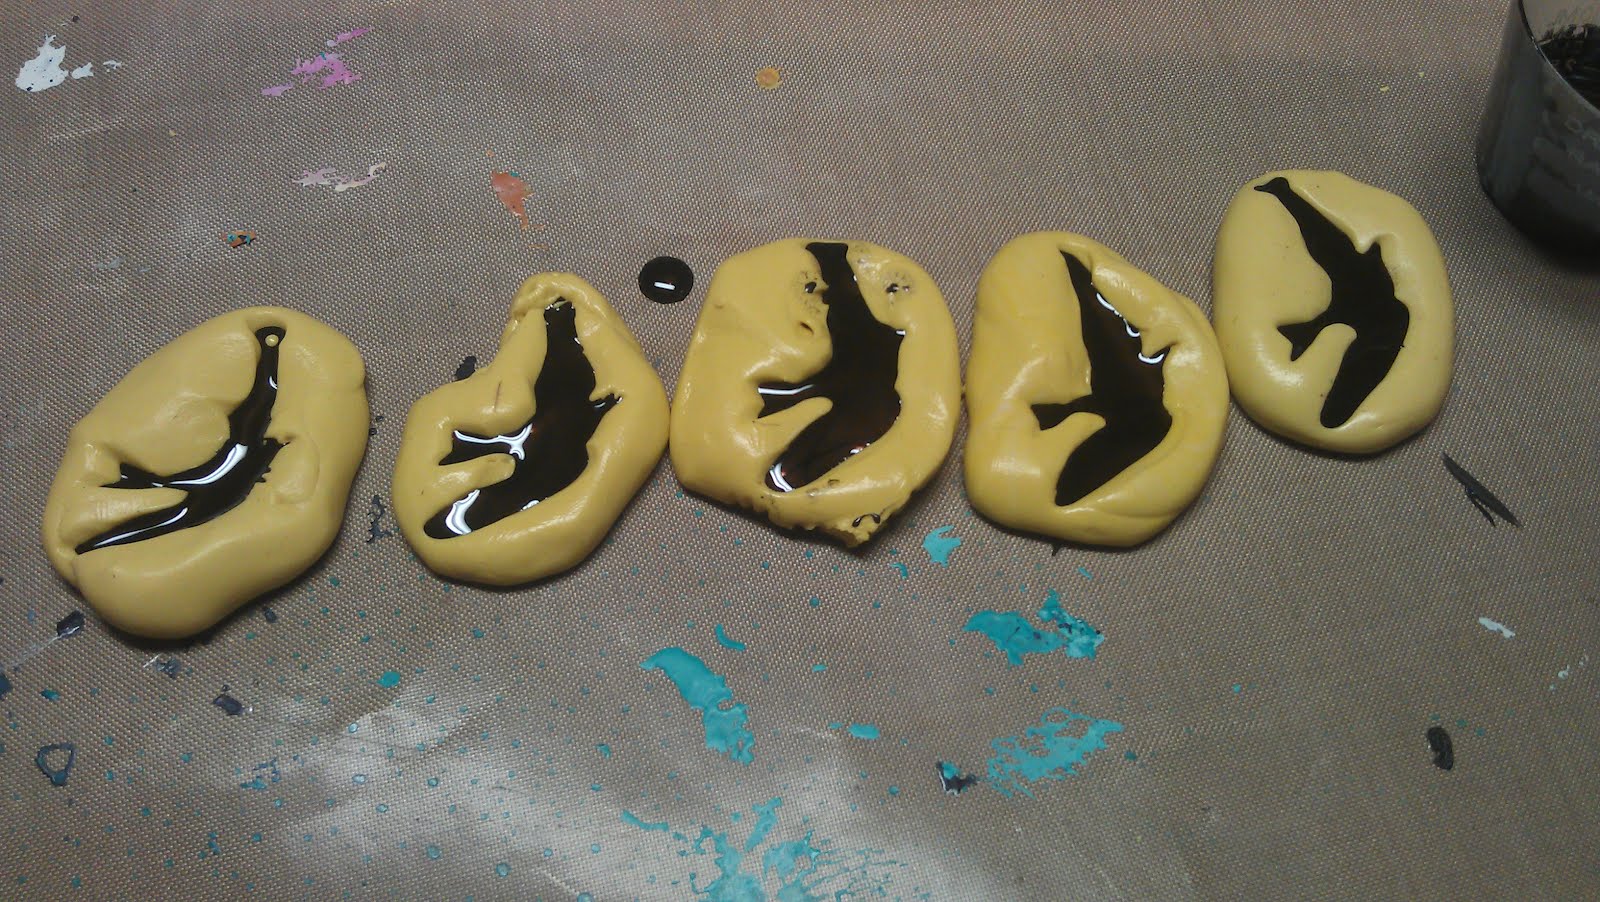
Time to get out my Amazing Casting Resin!
Following the directions on the package I measure out to equal parts of Part A and Part B to mix Amazing Casting Resin which sets up in approximately 10 minutes. Both parts of the resin pour out clear. Then I added a drop and I mean one drop of Alumilite Black Dye to Part A and mixed it well then combine both parts "A" and "B" and stirred thoroughly and quickly - Amazing Casting Resin sets up quickly. I poured some resin into each bird shape mold. Amazing Casting Resin has reached the flash point and turns from clear to opaque white but with the dye I couldn't see it turn white..LOL so I just waited about 10 minutes. Once it hardened I can remove these from molds. I used my X-acto knife and cut the charm hole opening off the wing. Oh they turned out so cute.....but they still needed something.

How about a little silver paint to highlight.....Perfect.

And this is my finished ATC with my bird attached. I really did like them. It was just to bad I didn't get to share them at the retreat.
Use coupon code AMP20 to receive 20% off your order.
Coupon expires - Sept 30, 2012
Hugs~~
Molly
Molly


