Monday, October 8, 2012

Steampunk Octopus Mask....


Hello Everyone...

Today I want to share with you my version of a Steampunk Mask. A few weeks back a fellow AMP artist made an Octopus Steampunk Pendant this wonderful piece inspired me to make a Pendant of my own to place as the centerpiece to my Steampunk Mask.

I started out with a plain white mask and painted it tan. I then stamped on it using black Stazon Ink.  I added some gears to the left side.


time to make my centerpiece...
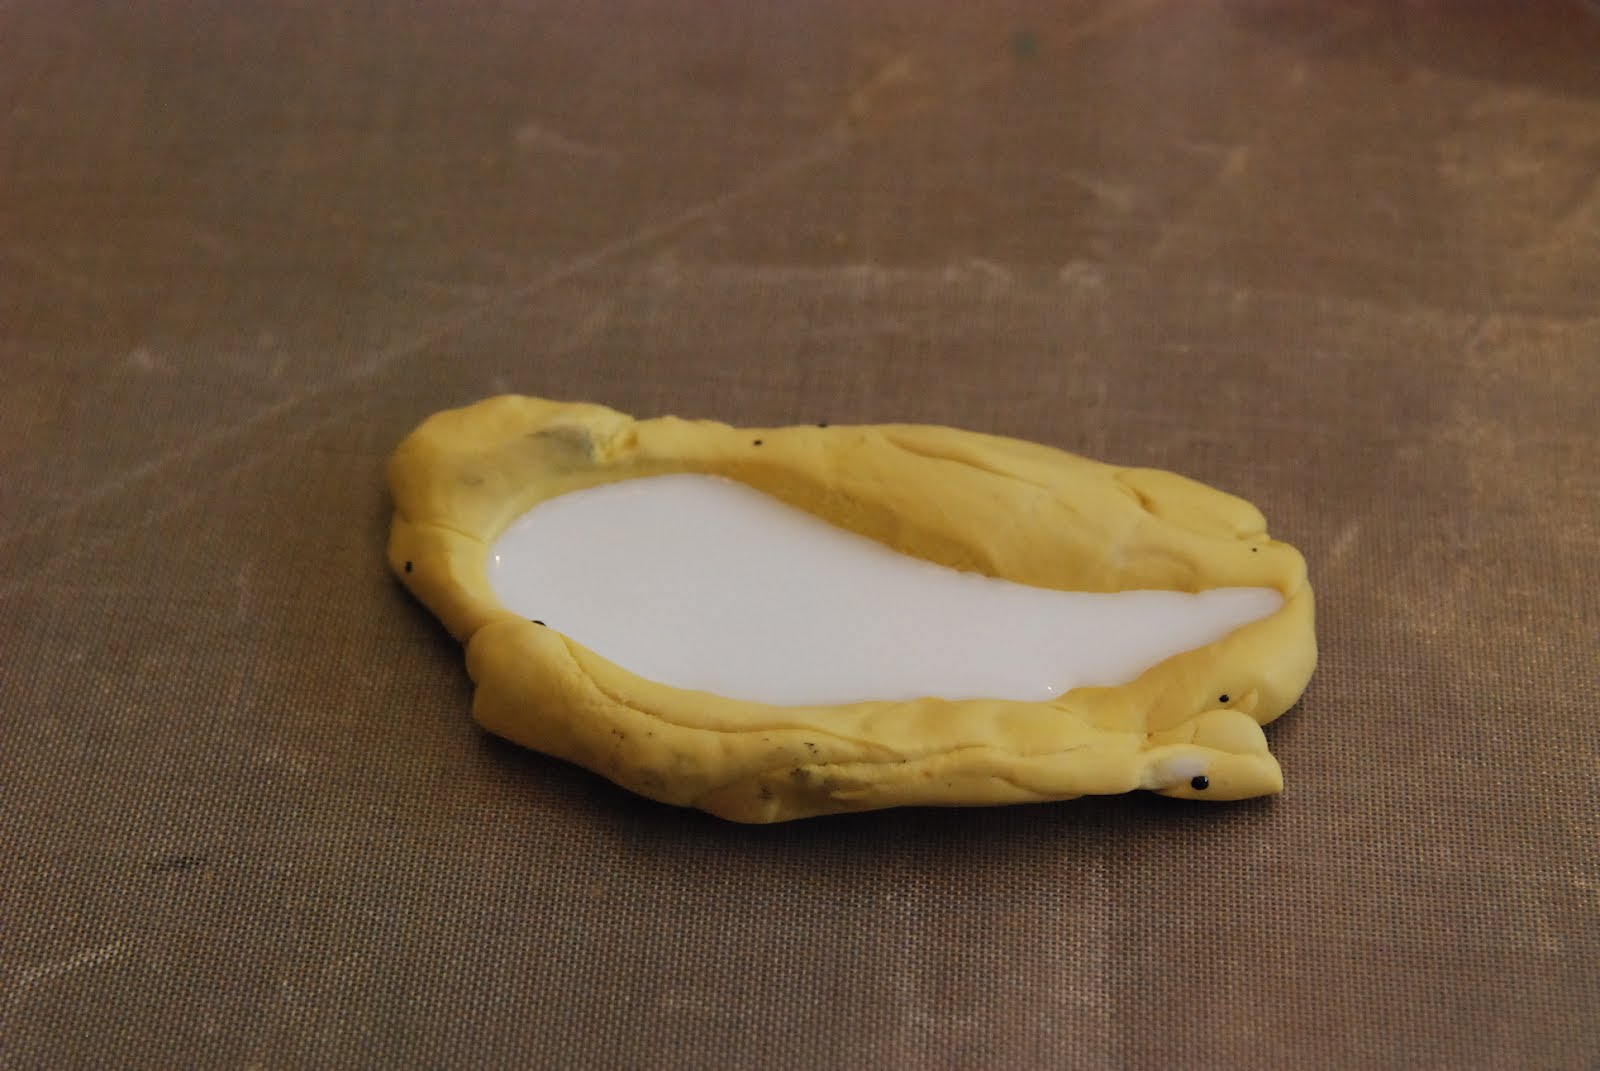
I mixed equal parts A and B Amazing Mold Putty. Mix thoroughly. Press the octopus into the putty - allow to set for 5-10 minutes then I un-molded the octopus.
Next I took out my Amazing Casting Resin.
Following the directions on the package. I measure out equal parts of  Part A and Part B I mixed the resin  together. I poured it into my molds. The resin sets up in approximately 10 minutes.

After I took the Octopus out of the mold I painted it black and then rubbed some gold paint to bring out the details.


At the end I added these black rhinestones....I like the way they look on the right side.

I hope you enjoyed my mask.

Hugs~~
Molly


Wednesday, October 3, 2012

Little Pumpkin...


Hello Everyone.

Today I want to share with you a cute little picture frame by Globalcraft Memories.

 The Pumpkin Bubble Frame Kit is fast and easy to assemble for your little pumpkins photo, but Hurry! Quantities on this adorable pumpkin frame are limited. Get yours before they are all gone.

Leave it plan or spruce it up soon.. How stinkin' cute is that?? Love it. Thanks for stopping by today.

To buy your Hobby Baby Products click HERE!!!  When you order be sure to use the 25% off coupon code TS25!


Hugs~~
Molly

Friday, September 28, 2012

Lighted Spider Hat...

Welcome to the Amazing Mold Putty and Creative Paperclay Blog Hop.


I'm Molly and I'm super excited to share my Lighted Spider Hat with you.

My hat started off as a paper mache hat from a local craft store. I started by painting it grey. I knew I wanted the hat to light up, so I needed somewhere for the light to come out... windows and a door. I had a resin window form that I thought would look really cool around the openings on the hat but it was so stiff and would not bend around the hat...time to make my own window form using Amazing Mold Putty.


 I mixed equal parts A and B of Amazing Mold Putty. Mix thoroughly. Press the window form into the putty - allow to set for 5-10 minutes then I un-molded the window. 


I then took Creative Paperclay and filled in the mold.  I made 3 windows, 2 to be windows, and the third to be the door (which I cut out the inside of the window with a knife and then used as a door.) While the paperclay was drying I laid them on the hat so they would dry curved like the hat. 

I finished off the hat by painting the door and windows. I added moss and a few rocks and my house was complete...well ALMOST

It felt like the hat needed to be sitting on something... A GIANT SPIDER The spider is made from a foam ball painted black with pipe cleaners as legs and googlie eyes to finish him off.


To follow along with the hop please use the links below. Don't forget to go to the AMP blog at the end and leave a vote for your favorite project for your chance to win. (and for my chance to win.)

Thanks for stopping by today and don't forget to leave some "love" (comment) 
Hugs~~
Molly


Tuesday, September 11, 2012

Happy Halloween with Basic Grey


Hello Everyone.

Do you ever get a creative block? I know I do. One thing I love to reach for at those times are greeting card kits, or scrapbooking kits. You might ask why, the reason is it gets me crafting and playing again. I also love the end products, which makes me want to play more.

So next time your at the store, pick a couple up, and put them aside for that next creative block.

You'll be so glad you did.

Hugs~~
Molly


Saturday, September 8, 2012

Flowers...

Hello Everyone.

I don't know about you, but I'm in love with the little resin flowers that have been hitting the market lately. They are so cute and the colors are beautiful. I want to use them on everything. But to be honest they can be a little pricey and the colors I have, aren't always the colors I need......
time to make my own...

With Amazing Mold Putty, Amazing Casting Resin, and a little Alumilite Dye, I can make as many flowers I want and in the colors I need....

I mixed equal parts A and B of Amazing Mold Putty. Mix thoroughly. Press the flowers into the putty - allow to set for 5-10 minutes then I un-molded the flowers.
Next I took out my Amazing Casting Resin.
Following the directions on the package. I measure out equal parts of Part A and Part B but before I mixed them I added a couple drops of dye to Part A and mixed it in well then I mixed the resin A ans B together. I poured it into my molds. The resin sets up in approximately 10 minutes.


Flowers, Flowers, Flowers. Oh so pretty and in different sizes and colors.


Here is a ATC canvas made with my little flowers.


Use coupon code AMP20 to receive 20% off your order.

Coupon expires - Sept 30, 2012
Hugs~~
Molly

Monday, September 3, 2012

The Holidays are Coming


Hello Everyone.

Today I am hoping to inspire you to think about what you are doing for gifts this holiday season. There are only 111 days till Christmas, will you be ready? I have been working on these gorgeous Christmas ornaments from Globecraft Memories. These ornaments are a great gift idea for family, friends, and hostesses during the holiday season. The best part is they are fun to make.

.
Make the Angel Ornament heavenly with Piccolo Enamel Powders.

The Sledding Ornament can be painted or covered in Piccolo Enamel Powders. I embossed the outside rim, painted it all white and then embossed around the snowflakes.


Give this ornament to those on your nice list. After embossing Santa I painted the background red to make him pop, then I added the ever popular backers twine around the rim.


Paint the back of globe to highlight the image inside or leave it plain to see all the way through the ornament. The choices are limitless: paint, paper, emboss, or any combination of those will create a fabulous and unforgettable holiday memory.

You can purchase the Piccolo Decor Set, bubble frames, and enamel powder at

25% Off

use Discount Code TS25 for 25% Off your entire purchase!


Hugs~~
Molly

Friday, August 10, 2012

Scrabble tile Necklaces...


Hello Everyone.

Have an old scrabble game? Try making this quick and cute necklaces. Some cute clip art and a little paint and glue and you have a easy gift for the holidays.


I made these for my nieces and used the first letter of their name so they know whose is whose.

Happy crafting. Any question please feel free to ask.

HUGS~~
Molly

Wednesday, August 8, 2012

Tooth Fairy Box

Hello Everyone.
Molly here with what I hope is something you can "sink your teeth into." O.k. so that was a bad joke, but it cracked me up.

Today I want to share with you a Tooth Fairy Box that I made for the little girl I nanny. I had been thinking about this idea for a while. I wanted to come up with some type of container for her to put her small teeth in, so the Tooth Fairy wouldn't have to try to find them under her pillow. This is what I came up with.

I had a pair of silver wings, but they just didn't look very fairy like, so I mixed equal parts A and B of Amazing Mold Putty. Mix thoroughly. Press the wings into the putty - allow to set for 5-10 minutes then I un-molded the little wings. Next I took out my Amazing Casting Resin.
Following the directions on the package. I measure out equal parts of Part A and Part B and mixed the resin. Then I poured it into my molds. The resin sets up in approximately 10 minutes.

I then took the wings and gave them a little sparkle using some glitter glue.

I stamped an image of a Princess and added the wings. With a little background paper and some bling to go around the edge, my Tooth Fairy box was almost complete.

The final step was to finish the inside with fabric and come up with a simple poem....

This is my little tin,

To put my baby teeth in-

For the Tooth Fairy to find,

So she can leave me something behind.

By Molly Walsh


Use coupon code AMP20 to receive 20% off your order.
Coupon expires - Sept 30, 2012
Hugs~~
Molly

Wednesday, August 1, 2012

Oh Happy Day


Hello Everyone....

Today is just one of those Happy Days for me and I hope it is for you too. How cute is this little dragonfly? I love how the Piccolo sets make beautiful cards quick and easy. This little dragonfly was colored with markers and then I added some glitter to the wing and added eyes.

The second project I would like to share with you is these Enjoy tag. Piccolo Card Decor is so easy to work with, you can paint it, color it with markers, or my favorite emboss it with beautiful embossing powders like Cranberry Wine by Globecraft Memories.


Hope these brighten your day.

You can purchase the Piccolo Decor Set, bubble frames, and enamel powder at

25% Off

use Discount Code TS25 for 25% Off your entire purchase!


Hugs~~
Molly

My new office.

Hello Everyone.

Today I wanted to share a few pictures of my new office.
I moved a few weeks back and haven't been blogging much while getting my house settled and working my other job as a Nanny. But today I'm going to give you a look inside my new office. Now I wouldn't say it's "done" cause its always a work in progress but I feel comfortable with the way it functions for right now..LOL

My new office is technically the Formal Dinning room, and my Dinning room is really suppose to be my Formal Living room but we don't really need need two Living rooms and I REALLY NEED a office so this is what I can up with.

If you are anything like me you love to look at others crafters work areas/offices ....
Hope you Enjoy.


This is the view from the Dinning room looking into my office. I Love the screen.


This the view with the screen removed so my office is open to the dinning room, good for when friends come to play.


That door is to the garage. Cabinets for Lots of storage.

View from the garage door.


Hope you enjoyed the look around my office. Now back to blogging about my art.


Hugs ~~
Molly


Monday, July 23, 2012

Meeting Kara Layne

Hello Everyone.

Today I would like to share a few of our family photos that we had taken by a wonderful photographer named Kara Layne. Kara is a wedding and lifestyle photographer based in Phoenix. I started following Kara's work when we lived in TN and love her style. I never thought I'd get a chance to have her do a photo shoot with my family, or get to meet her. Then we moved to California and I saw the most wonderful post on Facebook, Kara would be in South California for photo shoots. I was so excited. I hope you enjoy seeing the wonderful way she captured our family.


Years of reading in Laguna Beach

It was a little humid that morning, but the coastal air still blew and you could smell the ocean water. It stuck to your skin in the softest way. Although a bit warmer than usual, I had no complaints coming from the Arizona desert where, right now at this time of year, triple digit weather from AM to PM is our daily existence.

I stood there and waited, wondering what she would be like. What they would be like. If they would be outgoing, if they would be shy. And as if she could hear my thoughts, she appeared from around the corner followed by Dad and her two beautiful daughters. She smiled a smile that instantly put me at ease and I hugged her a tight one as we met for the first time.

Normally people would probably think they are the only ones nervous to be in front of the camera. But meeting someone for the first time? And someone who has mentioned that they have followed me and my blog for years? Well, let’s just say it’s a little intimidating and a lot overwhelming at times. Actually, to be honest, all the time. No matter how long I do this I think I will always be amazed when I meet a reader of my blog. But there was Miss Molly. What if I disappointed her? What if I wasn’t what she expected? I was in my head a little too much…

But as we walked along the coast line and talked about life and everything in between it was if I had known her for years. And as I got to watch their family from behind the camera, there was laughter and joking and love and it was all perfection. Absolutely perfection in Laguna Beach that day.

Miss Molly…words can’t describe how much I adore you. You and your family – I am so grateful to FINALLY be able to meet you and to have been able to document the four of you. I can’t wait to follow your own new venture and keep up with your family. Thank you so much for being you…

Saturday, July 7, 2012

a little birdie....

Hello everyone.

Today I would like to share a card I made. I had some cute little decorative items, (but as always) wanted to save them for the "PERFECT" card. Which is code for..... I'm cheap, and don't want to have to buy them again. Enter the AMAZING Mold Putty....


I mixed equal parts A and B of Amazing Mold Putty. Mix thoroughly. Press the items into the putty - allow to set for 5-10 minutes then I un-molded the little items (in this case it was the window frame and bird.)

I took out my Amazing Casting Resin.
Following the directions on the package. I measure out equal parts of Part A and Part B and mixed the resin. Then I poured it into my molds. The resin sets up in approximately 10 minutes.


I took the window frame and bird, painted and distressed them. I wanted a feeling that the window had been abandoned and that the bird had come to rest on it. I added a few handmade flowers and a flower swag. I finished by distressing the whole card by sanding and inking it.


I hope you find it inspiring.


Use coupon code AMP20 to receive 20% off your order.
Coupon expires - Sept 30, 2012

Hugs~~
Molly